
Monday, October 25, 2010
Saturday, October 23, 2010
Deer! In The Yard!
Our boys had breakfast AND a show this morning! We looked out the window to find two deer in our neighbor's lawn! Now, there is a woods right there, but still, this is the middle of a very populated street!

 As soon as a car went by, they both high tailed it into the woods. Joseph was very disappointed, and kept saying "Doggie! Where'd he go?"


Friday, October 22, 2010
How to Bake a New York Style Cheesecake in a Spring form Pan
Today I baked a cheesecake for small group tonight. The rest of the menu is chili cheese dogs and chips. Really goes together well, don't you think?! :P
So, this is how to make the perfect New York Style Cheesecake in a spring form pan.
First, you are going to need a recipe:

 For the crust:
 Find somewhere to work:
 A good spring form pan:


 It was a tedious process, comparable to that of beating egg whites into meringue using a hand crank egg beater like the Amish use.

 However, I did eventually end up with nice, fine crumbs!!
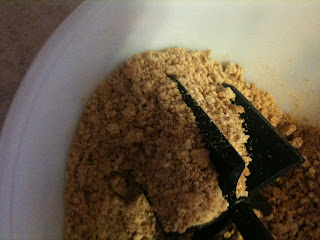
 then added the melted butter to the graham crumbs and sugar mixture...
 Mix thoroughly, til all the crumbs are nice and moist.
 ...then press the crust into the pan. If you are like me, and can't make a neat crust to save your life, use this little trick I tried today....a flexible spatula. It did a great job!
 See?! Nice and neat. I like to make the crust come only a little bit up the side. Some people prefer it all the way up the side, but personally I like less crust, more cheesecake!


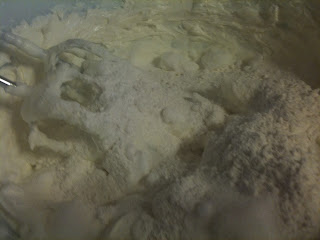
 Ohhh.....yummy cream cheese! Place the mixing bowl in the microwave for a minute or two (depending on your microwave), until the cream cheese is nice and soft, but not to the 'liquidy' point. You should be able to easily beat it with your hand held mixer on low to medium speed.
 After the cream cheese is nicely beaten (remember--just until it is fairly smooth. Over beating can cause cracking), add the flour and sugar, and beat just until blended.
 Add one Tablespoon of vanilla (I used white vanilla in this case because I wanted a super white cheesecake, but I would usually use regular vanilla. I'm not a brand snob, as you can tell by the picture of my ingredients, but I do think that having REAL vanilla extract as opposed to some imitation stuff, is going to cause a noticeable difference),
 and beat together just until blended. Add one cup of sour cream, and again, beat until just blended.
 Add the eggs, one by one, beating after each one until mostly mixed; then after the last egg beat until all is just fully incorporated. Your batter will be smooth and glossy (see picture below).
 Pour batter into spring form pan. Scrape around mixing bowl to get all the batter.
 All poured into the pan, and ready for the oven!
 Set the timer for 15 minutes.
 When your timer goes off after 15 minutes, lower your oven temperature to 250 degrees.
 Reset your timer for another 55 minutes.
 After 55 minutes, it's time to check on your cheese cake. Is it done? I wobbled the pan gently, and the center two inches jiggled just a bit. Perfect! See how beautiful this turned out, with no cracks? Now, be sure to follow the previous cooling instructions, to prevent cracking from still happening.

 Add your strawberries to the pot. I used 1 1/2 lbs of frozen whole strawberries. I let them sit in the fridge for an hour or two before I used them, so they were still soft frozen, but not mushy. This was the perfect consistency to easily use the Mix n Chop to chop them as finely as I wanted for the sauce.
 Next, I added roughly 3 Tablespoons of cornstarch, mixed with 2/3 cup of water.
 I also added 3/4 cup of sugar.
 I used this cute little mini whipper to combine the cornstarch with the water til the cornstarch was dissolved completely.
 Next, I added the cornstarch mixture to the strawberry and sugar mixture, stirring as I added it. I heated this over medium-high heat, stirring often with a bamboo spoon, until it just began to boil and thus thickened.
 This is my finished sauce. Notice the pretty red color? Well, I cheated...

 I added a nice little glob of this lovely red gel paste food coloring. That took the sauce from a pinkish color (after adding the cornstarch) to this beautiful red you see above. You can pick up this gel food coloring at Wal Mart, or at Hobby Lobby or Michaels in the section with wedding cake decorating supplies.

 This is what I was using in the above picture--a nice icing spatula.

 and garnish to your satisfaction. I used a fresh strawberry, cut in slices to make a fan.


So, this is how to make the perfect New York Style Cheesecake in a spring form pan.
First, you are going to need a recipe:

I refuse to make a plain (with no fruit swirled into it, or whatever) cheesecake that does not require at least 5 8 oz. bars of cream cheese. Cheesecake, in my opinion, should not be fluffy. It's all about how sinfully rich and bad for you it's possible to make it. :-) No light cream cheese for me! Here is the only recipe for plain cheesecake that I will use: New York Cherry Cheesecake . I don't nearly always actually make it cherry (in this case it's strawberry), but the cheesecake recipe totally rocks.
Gather your ingredients and equipment.
For the batter:


This is such a great spring form pan! The bottom of it is actually glass, which makes it nice and sturdy.
Be sure to have a big enough mixing bowl! There is nothing so annoying to me as having to empty all my ingredients into a different bowl before adding the last two ingredients to prevent my bowl from running over!!! Better too big than too small (that goes for a lot of other things as well, like chocolate cake...bags of chips...and well, OTHER things too).
Start with a smaller bowl (I often use a 4 cup liquid measuring cup) to mix up the crust. First you will need to crush the graham crackers. This is most easily done by placing them in a good, sturdy Ziploc bag and rolling them with a rolling pin. However, I loaned my rolling pin to my friend who was making the sugar cookies yesterday, as she did not own a rolling pin (can you even begin to imagine NOT OWNING a rolling pin??? I can't). That means I had to get creative today. I decided to try using my Mix n Chop (a handy nylon tool with pinwheel beveled blades, usually used for chopping ground beef or sausage during the frying process).


Once I had nice crumbs, I added the sugar I had pre-measured into one of my cute little prep bowls. I melted the butter in the microwave in the second prep bowl


Stick the crust in the refrigerator while you are preparing the filling. Alternately you can bake it for 10 minutes at 350, but I prefer the refrigerating method.
Now we are ready to move on to making the cheesecake filling. Before you get to that, I'd like to talk just a bit about the issues of cheesecake cracking, and how to tell when it is done. Cracks are caused by OVER BEATING the cheesecake batter, or by OVER BAKING. In order to prevent cracks make sure you beat the ingredients at low speed as, unlike a butter cake, you do not want to incorporate a lot of air into the batter, you only want to beat the ingredients until they are nice and smooth. As far as the over baking of cheesecakes goes, this is a common problem as it is difficult to know when a cheesecake is done. The thing to remember is that you want the cheesecake to be firm but, if you shake the pan gently, it should still wobble a little, and the center will still look a little wet. When your cheesecake is done, do not remove it from the oven immediately. Turn off the oven, and open the door somewhat, but let the cheesecake stand for a bit (say 15 or 20 minutes) just to settle a bit. It is important to do this to prevent your cheesecake cracking from extreme temperature changes. After 15 or 20 minutes, pull your cheesecake out of the oven and place it in a draft free area out of the way. Let it rest there until mostly cool (at least an hour or an hour and a half) before placing it in the refrigerator for at least 8 hours or, ideally, overnight. (This information was gleaned from my favorite recipe website.)
Now that you are ready to proceed with the filling, you need to pre-heat the oven to 350 degrees.

Next, unwrap the 5 bars of cream cheese and place them in your mixing bowl.


After making the sauce, you need to completely chill the sauce in the fridge before using it over the cheesecake. When both the cheesecake and sauce are cool, you are ready to top the cheesecake. First, choose a pretty platter to display your cheesecake. Make sure that the sides of the cheesecake are loose from the pan by running either a plastic knife, or something of that type (that won't scratch the pan) around the sides of it. Unclamp the side of the spring form pan, and remove the collar part. Now you should have just the cheesecake, sitting on the pan's base. Loosen the cheesecake completely from the pan before attempting to remove it.


Once the cheesecake is completely loosened, slide it onto the platter of your choice and center it. Top with the strawberry sauce,


Refrigerate until ready to serve. You may also garnish with white chocolate curls, if you like.
Serve, ooohh and aaahhh over how pretty it is, and ENJOY!
:-)
How NOT to Open a Corked Wine Bottle!
So, on a whim, I bought a cheap bottle of red wine. I got it home and wanted to give it a try (I'm not even remotely a wine expert)...but guess what, it had a cork. And I do not own a corkscrew (refer to previous comment that I am not a wine expert). So, I went at the cork with a nut pick, trying to pry it up. Here is a before and after of the nut pick:

 Guess what? That didn't work.
I ended up using the bent nut pick to push the cork down into the bottle, spraying myself and the counter and floor with wine in the process. I lost a lot of wine in the process...
 However, that really isn't such a big deal, as the wine turned out to be quite bitter and generally 'ewwwwie'.


I ended up using the bent nut pick to push the cork down into the bottle, spraying myself and the counter and floor with wine in the process. I lost a lot of wine in the process...

Thursday, October 21, 2010
Strawberry Cheesecake Trifle Recipe
This is a trifle that I invented earlier this year. It was probably the end of April. I had just gotten this Trifle Bowl for free as part of my hostess credit from the Pampered Chef party I hosted, and I just HAD to find a great use for it right away!! LOVE that trifle bowl! Not only does the pedestal part easily detach for storage, but it also has a lid so you can store leftovers in the refrigerator.

And here's the recipe, as promised!

And here's the recipe, as promised!
Strawberry Cheesecake Trifle
1 and 1/2 boxes fresh strawberries
2 8 oz. pkgs cream cheese
1 8 oz. tub whipped topping
1/2 cup powdered sugar
16 oz. strawberry glaze
2 boxes cheesecake flavored instant pudding mix (regular size)
3 cups milk
1 strawberry cake mix
Make strawberry cake according to box directions. Bake, remove from oven, and cool completely before cubing half of the cake into 1/2 inch cubes.
Mix 2 boxes of pudding with 3 cups cold milk. Refrigerate 5-8 minutes or until set. Pudding will be extra thick.
Place cream cheese in microwave safe mixing bowl. Microwave on high for 1 minute or until soft enough to whisk smooth with whisk. Add powdered sugar and 8 oz cool whip. Whisk together until smooth and fluffy.
Wash and prepare strawberries, removing stem and core. Slice using egg slicer (don't use an egg slicer from Wal Mart. It will almost definitely break.) Mix strawberry slices with glaze.
Layer in the trifle bowl in the following order, using about half the ingredients each time (so that there are two layers of each item when all is said and done):
Cake
Cheesecake pudding
Sliced strawberries in glaze
Cream cheese mixture
Ignore the order in the Trifle in the picture...I realized AFTER the fact that you really don't want to end the last layer in cake if you want a pretty trifle. That's why I grabbed another tub of whipped topping and loaded the top of the Trifle with it--so that the cake cubes wouldn't be jutting out the top.
I don't know that you can really see it in this picture, but I ended the trifle by placing a few choice strawberry slices on top to form a flower shape. Ideally I would have tucked a fresh mint leaf or two along side of those, but I didn't have any, and green onion sprigs on top just didn't sound appetizing at the time...not sure why?!
Good luck, and if anyone decides to try their hand at this trifle, I would love to see pictures and hear what you think!
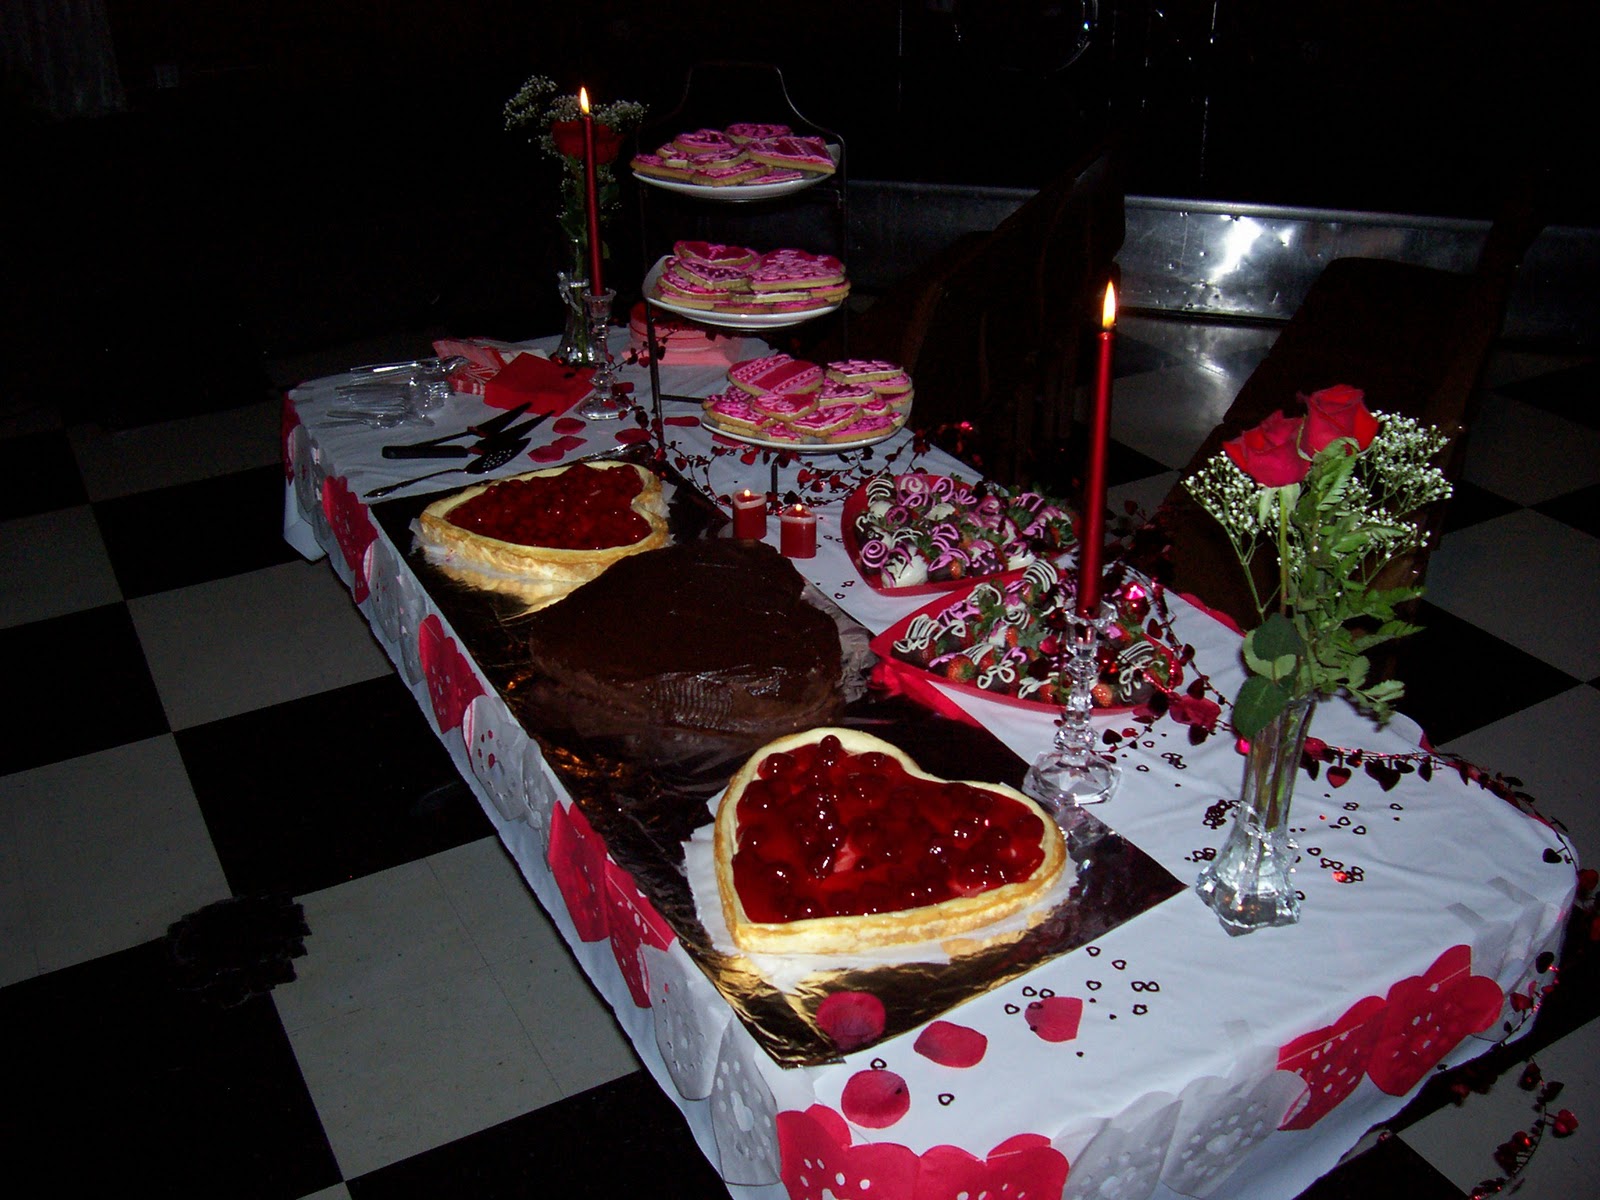
Valentine's Day Sugar Cookies
Ok, so it's totally the wrong time of year to be posting this, but I really wanted to share a couple pics of the cookies I made last Valentine's Day for the Sweetheart Banquet I helped set up. I also made cherry and strawberry cheesecake and chocolate cake, and chocolate dipped strawberries. There was almost nothing left (which is the way I like it)!!


 Wow, this makes me hungry! It was so much fun to put together! I am really looking forward to making Christmas cookies this year. I intend to have some fun with them as well. :-)
Ok, this blogging thing is so addicting that after I post this, I am going to post one more with a really great trifle recipe that I made this spring. I found the picture while pulling up the ones of these cookies and strawberries, and I just can't resist sharing it. The post with the step by step how to make the chocolate covered strawberries pictured above will have to wait though!! :)


Ok, this blogging thing is so addicting that after I post this, I am going to post one more with a really great trifle recipe that I made this spring. I found the picture while pulling up the ones of these cookies and strawberries, and I just can't resist sharing it. The post with the step by step how to make the chocolate covered strawberries pictured above will have to wait though!! :)
Subscribe to:
Posts (Atom)